2026 How to Replace a Drier Filter in Your Refrigerator?
In the world of home appliances, maintaining a Drier Filter Refrigerator is crucial for optimal performance. Expert technician Jane Holloway emphasizes, "A clean drier filter can significantly extend the life of your refrigerator." This statement underscores the importance of regular maintenance.
Refrigerators, like all appliances, require care. The drier filter often gets overlooked. A clogged or dirty filter can lead to cooling issues and increased energy use. It may also allow moisture to build up, causing further problems. It's easy to forget about this small component, yet its role is vital.
Many homeowners may struggle with the replacement process. They worry about making mistakes. It can feel overwhelming. The truth is that replacing a drier filter is manageable for most. With simple tools and guidance, anyone can do it. However, understanding when to replace and how can be a challenge, often requiring reflection.
Understanding the Role of Drier Filters in Refrigeration Systems
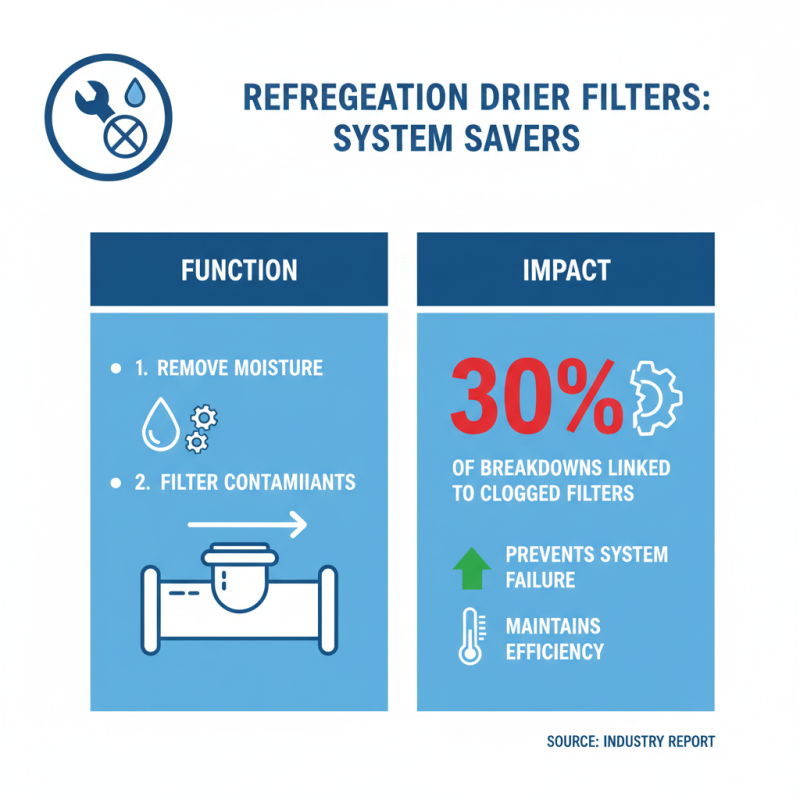
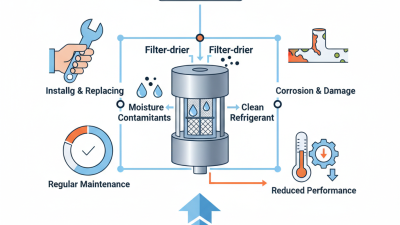
Drier filters play a crucial role in refrigeration systems. They keep the refrigerant clean. By removing moisture and contaminants, they help prevent system failure. According to a recent industry report, nearly 30% of refrigeration breakdowns are linked to clogged filters. This highlights their importance in maintaining efficiency.
Regularly replacing your drier filter can enhance system performance. Dirty filters can lead to inefficient cooling. This may increase energy consumption by up to 15%. A simple filter change can save money and reduce energy waste. Pay attention to unusual noises from your refrigerator. They might indicate a filter issue.
**Tips:** Check your filter every six months. Remember to clean the condenser coils as well. This improves airflow and reduces strain. When replacing the filter, ensure proper installation. Misalignment can cause leaks and more significant issues. Always refer to your system specifications for guidance.
Common Signs Indicating the Need for Drier Filter Replacement
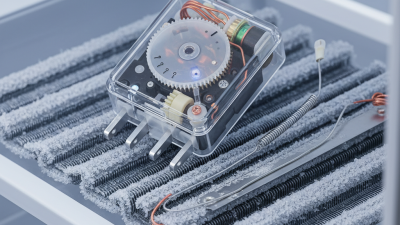
The drier filter in your refrigerator is crucial for maintaining optimal cooling. It removes moisture from the refrigerant. When this filter starts to malfunction, you'll notice some common signs. One of the first signs is frost buildup. If you see ice forming inside your fridge, it might be time for a change.
Another sign is strange noises. A failing filter can cause the compressor to work harder. This often results in loud, unusual sounds. Additionally, you may experience an increase in your energy bill. A refrigerator that struggles to maintain a cool temperature can lead to higher energy consumption.
Lastly, if you smell unusual odors, that’s a red flag. A clogged filter can cause food spoilage. It’s essential not to ignore these indications. Replacing the drier filter prevents further damage. It’s a simple task that can save you money in the long run. Recognizing these signs can help keep your refrigerator running smoothly.
2026 How to Replace a Drier Filter in Your Refrigerator? - Common Signs Indicating the Need for Drier Filter Replacement
| Signs |
Description |
Recommended Action |
| Increased Energy Bill |
Higher than usual utility costs may indicate inefficient appliance performance due to a clogged filter. |
Check and replace the drier filter immediately to restore efficiency. |
| Excessive Frost Build-Up |
Frost accumulation in the freezer is a sign that air flow is restricted. |
Inspect and replace the drier filter to prevent moisture issues. |
| Poor Cooling Performance |
Food is not staying cold enough, suggesting a malfunction in the cooling system. |
Replace the drier filter and assess the overall system performance. |
| Strange Noises |
Unusual sounds coming from the refrigerator could indicate blockages or overworking components. |
Check the drier filter and replace it to help reduce noise. |
| Leaking Water |
Water pooling inside or around the refrigerator may be due to clogging. |
Replace the drier filter to improve drainage and prevent leaks. |
Step-by-Step Guide to Safely Remove the Old Drier Filter
Replacing a drier filter in your refrigerator is essential for optimal performance. When air circulates through a dirty filter, it can affect cooling efficiency. According to recent industry reports, a blocked drier filter can reduce energy efficiency by up to 30%. Clear, cold air is crucial for food preservation. Addressing filter changes can lead to significant cost savings in energy bills.
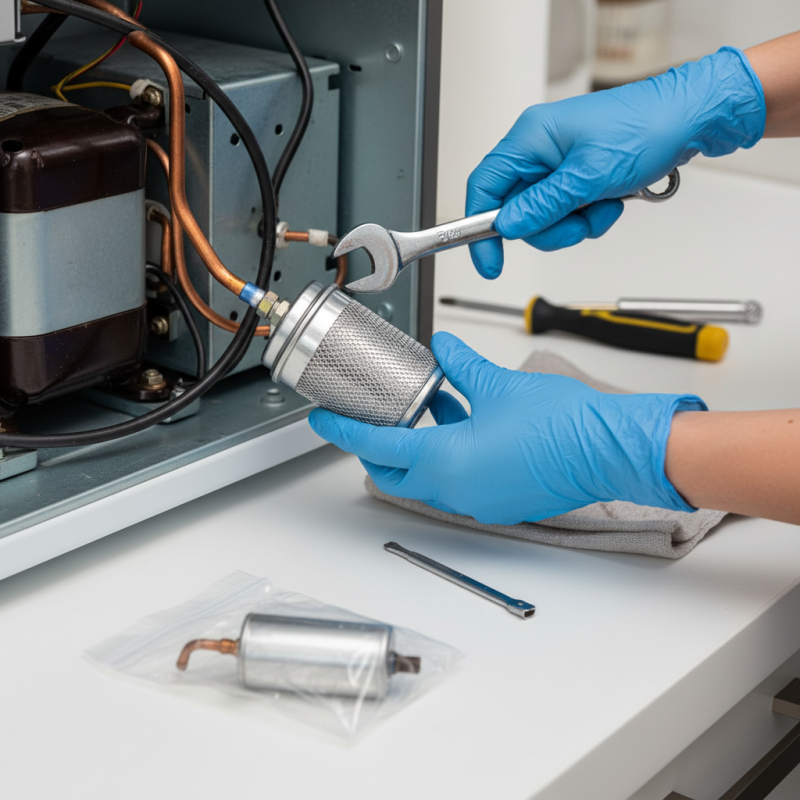
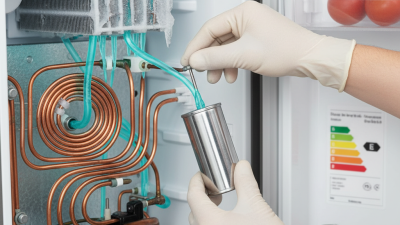
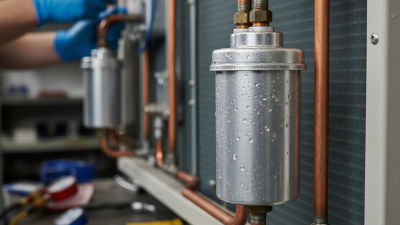
To begin, disconnect the refrigerator from the power source. This is a critical step. Locate the drier filter, typically found near the compressor. Gently remove the cover if there is one. Handle it cautiously; not all components are made of sturdy materials. If the filter looks dirty or has visible blockages, it's time for a replacement. It's recommended to check the filter every six months. Sometimes, filters may look clean but still need changing to ensure optimal airflow.
After removing the old filter, install the new one. Make sure it fits snugly; an improper fit can lead to leaks. Remember to replace the cover and reconnect the power. Run the refrigerator for a while and check for unusual noises or inefficiencies. Reflect on your maintenance routine. Regularly replacing the drier filter is a simple task that can extend the life of your appliance. It’s not just about fixing what's broken; it’s about preventing future issues.
Choosing the Right Replacement Drier Filter for Your Refrigerator
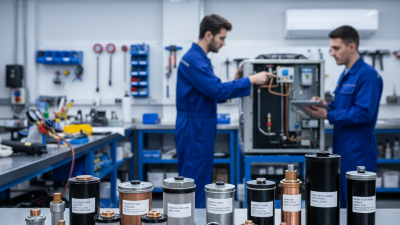
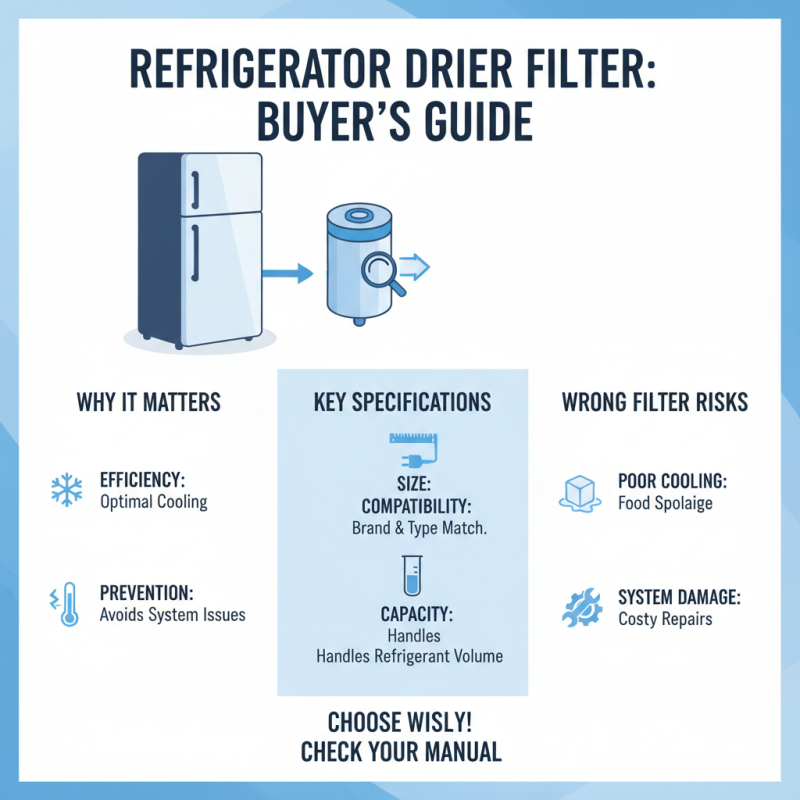
Choosing the right replacement drier filter for your refrigerator is crucial. A drier filter ensures the efficiency of your refrigeration system. Selecting the wrong filter can lead to cooling issues, and that’s the last thing you want. You should pay attention to the filter's specifications. Size, compatibility, and capacity are all essential. The new filter must fit your refrigerator model perfectly.
Inspecting the drier filter regularly is important to maintain optimal performance. Sometimes, it’s easy to overlook this task. Filters can get clogged with dust and debris. This can affect your fridge's functionality. When searching for a replacement, check the material composition. Some filters may have better moisture absorption properties than others. You might also notice differences in price and lifespan.
Not all replacement filters are created equal. Reading reviews can help, but don’t rely solely on them. User experiences can vary based on specific situations. You might find yourself returning to the store more than once. Keep the receipt, just in case. It's an opportunity to learn what works best for your appliance. Always document your choices and their outcomes. This knowledge will guide you in the future.
Best Practices for Installing and Testing Your New Drier Filter
When replacing the dryer filter in your refrigerator, understanding the best practices is crucial. Start by turning off the refrigerator. This simple step ensures safety during the installation. Remove the old filter carefully. Check for any debris that might have accumulated. It’s essential to ensure a clean connection for the new filter.
Installing the new filter may seem straightforward, but precision matters. Align the filter exactly as it fits. A misalignment can lead to inefficiency. Ensure the filter clicks into place securely. After installation, it's time to test your new filter. Turn the refrigerator back on and check for any leaks. A dry area signifies a successful installation.
Tips to consider: Always wash your hands before handling the filter. Dust and oils can affect performance. Regularly check the filter every few months for maintenance. If you notice strange noises or inefficiencies, reassess the installation. Your attention to detail pays off in the long run, contributing to your refrigerator's effectiveness.
2026 Drier Filter Replacement Effectiveness